

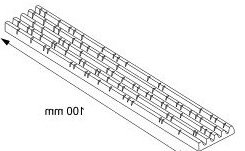
Drive belt diagrams are a frequent request from do it yourself mechanics visiting the site. Below will be links to pictures and articles about replacing serpentine belts on specific models. I am starting out with the most popular by request.
I am also leaning towards older engines because in many cases the factory included belt diagram that was glued to the fan shroud can become faded or disappear all together. Below will be more information and tips about engine belts and there replacement. Note: I have some good information on my other site about Engine Timing Belts that could help.
If your car or truck is not included below I recommend that you take a look at your car repair manual. This is an inexpensive way to immediately access the information you need for belt replacement.
Find Your Online Car Repair Manual Today! ->>
Most Requested Engine Belt Diagrams
Ford Power Stroke belt diagram
General Motors 3.6L V6 Belt Diagrams
4.3 Liter Chevrolet V6 belt diagram
Engine belt diagram 5.7 Liter Chevy.
Drive belt diagram 5.4 liter engine Ford.
Chrysler Belt Diagrams 3.9L 5.2L 5.9L
Engine belt diagrams 4.9l ford
4.0 Liter V6 Ford Belt Diagram
Serpentine belt routing and the Cadillac v8 belt diagram
Drive belt diagrams section of the car repair blog.
Drive Belt Cracking
Many DIY car mechanics as well as professional technicians lean toward replacement when they see cracking on the ribs on the face of the belt. Minor cracks are a normal part of the aging process of a serpentine belt.
Opinions vary greatly on this subject and in the end you will have to use your best judgment. One thing to consider is the age. How long will engine belts last? If the vehicle is over 5 years old with the original equipment part consider replacing it.
A rule of thumb that I use (just my opinion) is to count the number of cracks within 2 inches of the engine belt. If the number of cracks is above 10 in those 2 inches then I replace it. If there is less cracking, I will usually wait until the next maintenance service and recheck it.
How to Check Serpentine Tensioners
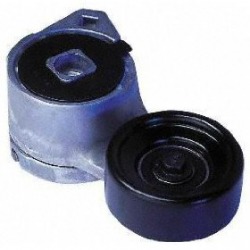
Do not underestimate the power of the tensioned spring and always wear safety glasses. They make a special tool for replacing serpentine belts and checking tensioners (Below). In my opinion this is a must-have for Diy mechanics and professionals.
I own one that was made by the Lisle Corporation, and I use it often. Some Techs will use a breaker bar with a long handle. The thickness and bulk of a breaker bar can be difficult to use on some models. Hence the guys I work with are always borrowing mine.
Check that the tensioner has smooth operation and is not binding or sticking when you operate it. The force required to disengage the belt should increase as you reach the travel stop. Also look closely at the unit to make sure that no looseness is present between the two main halves of the part when rotating it.
Finally check the tensioned pulley for damage and check the bearing for problems as well. The bearing should spin the pulley freely with no rough spots, wobble or looseness. This part is critical to belt wear and proper noise free operation.
What to do With the Old Engine Belts
When I am replacing engine belts on my own vehicle I take the old ones and throw them in a bag with the print out of the belt diagram. Placing it in the trunk or interior storage compartment for emergency purposes is better than throwing it away. Also don’t forget to store the tool needed to rotate the tensioner in the vehicle as well.
A flashlight is a good thing to have in your automobile for many reasons but a necessity for night time on the road belt replacement. If you are out for a drive and you have a belt failure you’ll be glad that the old Belt is in your trunk. This next link takes you back to the homepage from this drive belt diagrams page. Here you can find out what other kinds of information can be found for Diy automobile repairs.